My Experience and Review on L'Oreal Excellence HiColor Hilights Copper

First Off
I am very sorry for anyone who read my previous review about L'Oreal HiColor Sizzling Copper and was possibly waiting for this review, which is half a continuation of my review for my quest for copper-red hair.
Why is L'Oreal HiColor Hilights Different?
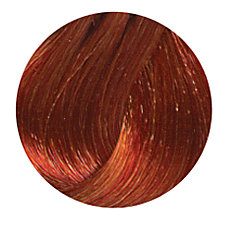
L'Oreal HiColor HiLights is not only the color used to dye your hair, but adds lightening so you can color and lighten your hair in one step. This makes dying your hair to a lighter color much easier. However this is intended for dark hair, and since this is HiColor HiLights it is meant for putting highlights of color. The HiColor Hilights come in three different colors; Magenta (a more pinky red), Red (which is very almost fire engine red), and Copper (which looks nearly orange).
My Current Hair Coloring Info To Consider
Please take into consideration that this review is based on my personal experience on my own hair and it may differ from your experience and outcome. My hair had been, within about a month, dyed a dark red. Soon after that I decided to got a much lighter copper red and so I tried the L'Oreal HiColor Sizzling Copper, which was about the shade I wanted. After seeing the results of using the Sizzling Copper with a 40 volume developer, it didn't lighten my hair nearly as much as I wanted (and I chalk this mostly up to having such freshly dyed darker hair).
After lots of deep conditioning and repairing my dry hair, I decided to get the HiLight Copper, which was lighter and much oranger than the Sizzling Copper, and since this was labeled Hilights, I thought I would lighten my hair much more than the regular HiColor dyes.
My Process
I bought two tubes of the HiColor Hilights Copper dye (because my hair is quite long and usually uses around 2 tubes of color or two boxes of the hair dying kits) and used a 30 volume creme developer. Since the creme developer is thicker, I recommend you buy three tubes of color if you have long hair and are using creme developer as opposed to the clear developer because I was scraping for the last bit to cover all of my hair. I didn't have that problem with the clear developer because it was runnier and easier to spread through my hair. I also put it on the bottom first and then the roots in order to keep my roots from being too much brighter than the rest of my hair.
I left it on my head for about 45-60 minutes (this is longer than the box recommends but I really wanted lightened results) and rinsed it out in lukewarm water and deep conditioned my hair to start helping with any damage.
My hair did in fact lighten quite a bit, particularly closer to the roots and around the back of my neck. The parts that really lightened up was the color I was looking for but most of my hair only lightened a little bit, and not nearly the color I was really going for.
My Review
The dye did lighten my hair, but not nearly as much as I would have liked it to. I've heard of people getting better results by doing it twice over two days if they have hard to dye hair, but I felt I had already dyed my hair so much recently that it would damage my hair to dye it yet again the next day. I also figure it is because my hair is so recently dyed that it did not lighten as well as it should have. I feel that if your hair is not recently dyed, or not dyed at all, you will have much better results. I'd also caution you if you have light hair, since it has lightening in the dye already, it may change the expected results.
However, despite my lack of wanted results, I will probably give this dye another chance one day down the line when my hair isn't freshly dyed and more likely to dye better. I have had friends with much better luck using this product on their hair (that was not freshly dyed) and so I am willing to give it another chance and even recommend it as it seems to work well on faded or undyed hair.


